Kk2 receiver hookup
Contents:
If you want to flip and roll, you will need to increase the Roll and Pitch values. Increase the Yaw value to yaw to your liking. Throttle is best left at If you set the value to a negative value, it will reverse the transmitter channel.
What can be the glitch?? This is my first Flight Control Board. Front left is 1, kk2 go clockwise 2, 3, 4. September 17, at 3: Skip to content So as is evident from my other posts, I decided to scratch build myself a quadcopter, which I had to take myself from literally no understanding of these things at all to being able to build one that flies properly which I did in fact manage to do. October 16, at November 2, hook up March 5, at 7: Power down TX
The default is 0 disabled. Limit — The percentage of motor power that can be used to apply the correction. Servo Filter — Software filter that smooths out the control signal to servos. This value can be increased to mask vibrations. It is best to leave it at this value.
Popular Posts
The above mentioned settings may have little variations as per the firmware version you flash into your KK2. We will summarise the Initial Setup of the KK2. Power up the KK2. Select the required Motor Layout. Select the Receiver Type in Mode Settings. If necessary, change Channel Mapping.
- KK2.0 Flight Controller – Setup and Settings.
- Help to connect wires to KK2.1.5.
- hook up maui.
- dating with a chronic illness.
- dads against daughters dating shirts.
- watch dating rules from my future self megavideo.
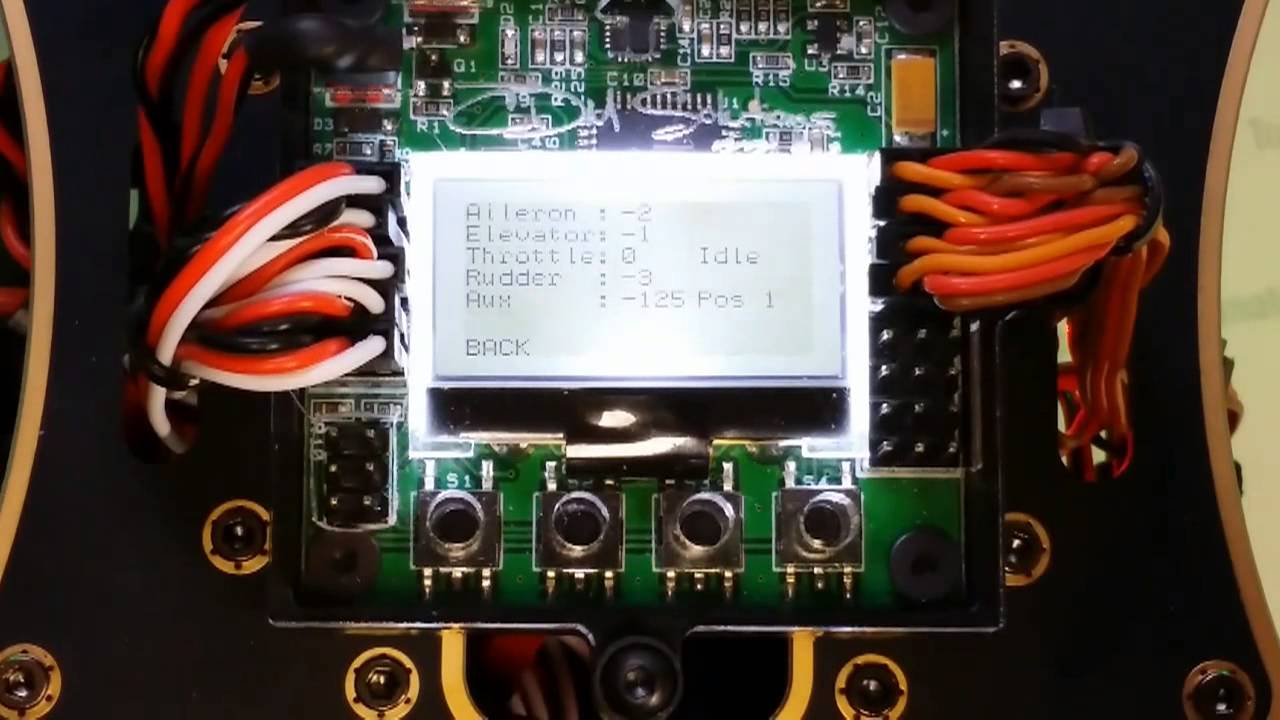
Power down the KK2. Set up your transmitter as a simple aircraft with no mixing. If necessary, bind your transmitter to the receiver. Power up your transmitter. Connect the receiver to the KK2. Refer to the Receiver Test section and set up correctly. Power down your transmitter.
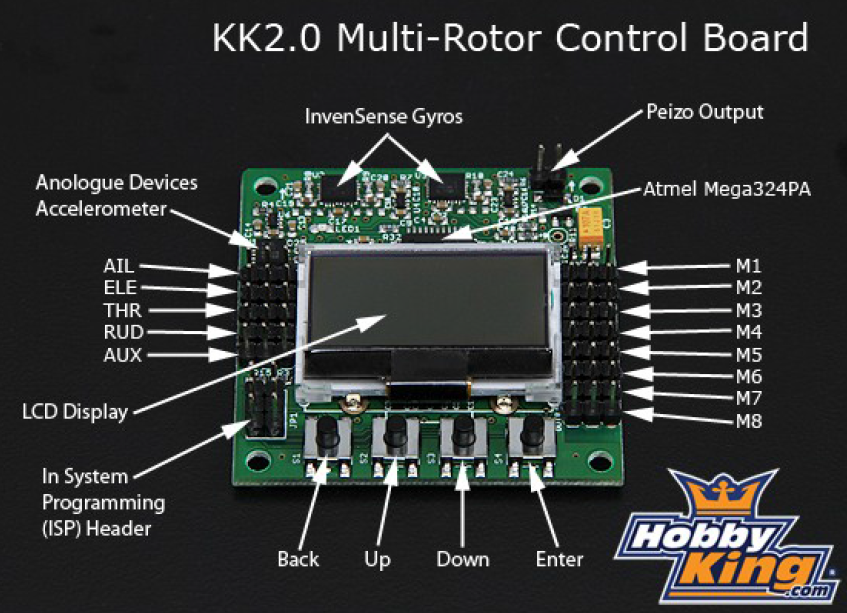
Setup of the KK2. Connect the receiver to the pins on the left side. Connect the ESCs and servos to the pins on the right side. Connect buzzer and battery voltage monitor if required. Turn on your transmitter.
Place the Multi copter on a level surface. Calibrate the accelerometers using the ACC Calibration menu option.
- estey organ dating.
- starcraft matchmaking.
- dating swindon wiltshire.
- dating divas 75 bedroom games.
- speed dating nice 23 septembre.
- online dating in el paso tx.
All propellers should still be removed. If not, check the stick directions in Receiver Test.
Kk2 receiver hookup
Turn off the Multi copter Turn off your transmitter. Now you are ready for initial PI turning and flight testing. Check each one and if any are reversed, reverse any two motor wires on your ESC which will reverse the motor direction. Turn on the transmitter and set the throttle to max. Press down button 1 and 4, keep pressing until last step.
Aug 21, The KK2 board is whats known as a flight controller, which is basically the Inputs – This will be the connection between the receiver from your. Mini-HowTo KK Quick Start Guide R/C Blogs. This guide also assumes that you have your Transmitter and Receiver all set up and bound. Hook up ESC's to right side pins, motor 1 goes to M1, motor 2 to M2, etc, signal.
Releasing the buttons aborts the calibration. Turn on power to the FC 4: Wait for the ESC to beep its full throttle calibrated signal. When You hear two short beeps put the throttle all the way down. Wait until you hear one short beep then release the buttons. Do a Sensor test. Choose how you want to turn on and off Self-Level mode. This is in Mode Settings, Self-Level. Choose Aux or Stick.
Hobbyking KK2.1.5 – Beginner guide
If you choose Aux you can turn on and off Self-Level mode on your transmitter with a switch. If you choose Stick you turn on and off Self-Level mode by holding the aileron to the right when arming or disarming. Turn it of with left aileron. The negative wire is redundant unless you are running on a plane. You are ready for a test flight. You can use the default settings for starting points as I did for version 1.
I recommend you try Self-Level for your first flight as I did. Here is what I used. Another option if it is too responsive is to turn down the numbers in the Stick Scaling. Higher numbers gives higher response. The stock value for Self-Level P Gain: I would put it at 50 and adjust it from there as needed. To Arm and Disarm the Flight Controller: Arm with right rudder and zero throttle.
Disarm with left rudder and zero throttle. Power the quad and lift off a bit about a foot or so and check that the quad goes in the direction of the sticks. If OK you should be good for your first test flight. Go easy on the sticks until you see how the quad reacts. I used this guide after I flew my quad with the default settings which some settings I changed in both Self-Level and Acro mode. The aircraft reacts faster and feels more connected to the stick movement and wander less on its own. The aircraft may oscillate for a short time.
Usually a few oscillations, but may be more if gain is high. If it oscillates continually the gain is too high. The aircraft may be harder to land, it bounces back when touching down. The aircraft may climb. When the aircraft has a good response and does not oscillate or climb when testing, P-gain is good. Increase Yaw P-gain by 10 5 or less for a small aircraft at a time, and test your aircraft response by hovering and move the Yaw control stick until it have. The aircraft start and stops faster. The aircraft overshoots less.